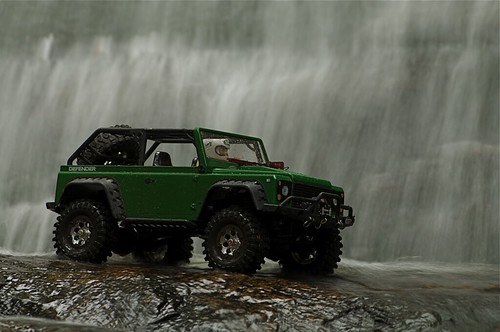
Scale model truck (Radio Controlled) sitting in front of a waterfall. The goal was to show the truck an environment that makes the 1/10th scale truck difficult to determine.
I had to climb out into the water fall to get the shot. The water must have been only 50 degrees or less, so it was a bit cold on the feet. Good thing it was fairly warm outside.
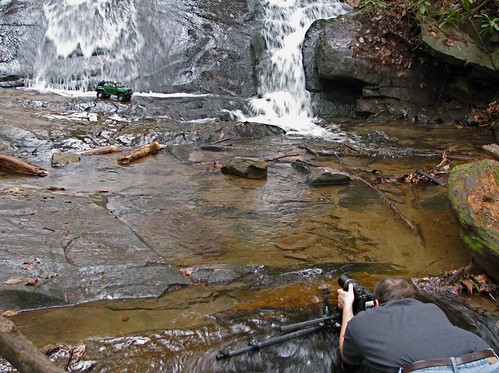
Here is the setup shot:
I used the DA* 60-250mm f/4 because it was weather sealed and it provided the reach and background separation I wanted. Don't be afraid to get dirty to get the shot you want.
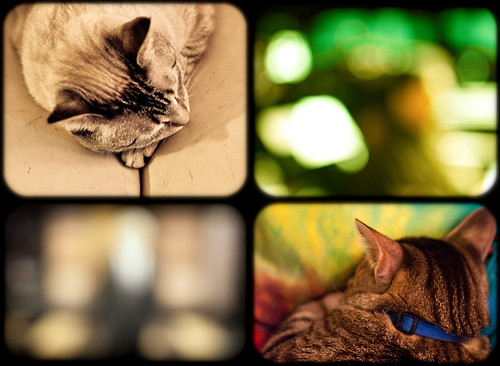
These litter-mates lay peacefully, deep in sleep, dreaming about what tomorrow will bring.
How neatly a cat sleeps,
Sleeps with its paws and its posture,
Sleeps with its wicked claws,
And with its unfeeling blood,
Sleeps with ALL the rings a series
Of burnt circles which have formed
The odd geology of its sand-colored tail.
I should like to sleep like a cat,
With all the fur of time,
With a tongue rough as flint,
With the dry sex of fire and
After speaking to no one,
Stretch myself over the world,
Over roofs and landscapes,
With a passionate desire
To hunt the rats in my dreams.
I have seen how the cat asleep
Would undulate, how the night flowed
Through it like dark water and at times,
It was going to fall or possibly
Plunge into the bare deserted snowdrifts.
Sometimes it grew so much in sleep
Like a tiger's great-grandfather,
And would leap in the darkness over
Rooftops, clouds and volcanoes.
Sleep, sleep cat of the night with
Episcopal ceremony and your stone-carved moustache.
Take care of all our dreams
Control the obscurity
Of our slumbering prowess
With your relentless HEART
And the great ruff of your tail.
-- Pablo Neruda
Our eyes can only see a small slice of the energy radiated from the Sun. We call the energy that we can see "Light". If we look at a rainbow there are the 7 colors: red, orange, yellow, green, blue, indigo, and violet. However, there is energy that is high frequency than Violet called "Ultra Violet" (UV) and energy that is lower frequency than red called "Infra Red" (IR).
Thankfully, digital sensors are very sensitive to light in the near infrared spectrum, but the sensors are not sensitive to heat that is far beyond the visible red light (far infrared). Energy with a wavelength of about 10,000 nm is perceived by us as heat, and it takes a different kind of camera to see heat.
However, since digital sensors are so sensitive to IR, the manufacturers install IR cut filters directly on the sensor to prevent the IR from spoiling color photographs (it turns black clothes gray, etc). Because of this it is best to convert the camera by removing the IR cut filter, although you can still take IR pictures without doing this, the shutter speeds will be very long.
You might also be thinking UV, but light in the UV sepectrum is mostly filtered out by the superb modern coatings on the lenses (and the glass itself), but the sensors are sensitive to it. Some older lenses or specialized quartz lenses can focus UV effectively.
The camera sees IR as intensity, with no hue or saturation to it. A true IR picture will therefore be black and white. If an IR picture is B&W, what is the point of using IR instead of visible B&W? Because objects in the world do not reflect IR the same as they reflect visible light.
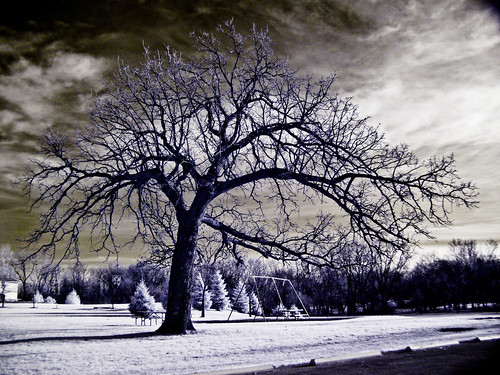
IR is reflected from foliage in pretty uniform intensity, so pretty much all foliage will appear gray or white on an IR image. Also, a clear blue sky reflects almost not IR energy and will appear nearly black. IR is an excellent way to separate foliage from man made objects, and more. For example, a statue in a flower garden stands out as black against white, a traditional B&W would be lower contrast here.
Non-converted IR camera with 720 nm filter, B&W (Fujifilm S1 Pro)
Similar shot in visible light (Pentax K-2000)
Light has an associated wavelength to it. This wavelength determines if we can see the color of light or not. Infrared is everything above approximately 700 nm, and ultra violet is everything below approximately 400 nm. The smaller the wavelength the higher frequency, so 400 nm is a high frequency and 700 nm is a lower frequency.
Don't worry too much about these numbers, except when buying infrared filters. A 720 nm filter cuts off light below 720 nm, so only IR above 720 nm gets through (these filters look black if you look try to look through them). A 720 nm filter still lets some visible red through, but an 800 nm filter or above cuts off nearly all visible light and will offer a nearly black and white picture.
So how do you get started in IR? Well first, you need an IR filter. If you have an SLR you can just screw this filter into the lens and take a picture. The issue is you can't see to focus or compose, but the AF sensors in the camera should be capable of focusing IR light automatically. If you haven't modified the camera, the shutter speeds will be very long too, several seconds at ISO 100 in bright daylight.
If you aren't handy with tools you might buy a camera that has been converted to IR. This is a camera that has had the IR cut filter removed and replaced with an IR filter on the sensor (or left with no filter and the IR filter is placed on the lens.
What is involved in converting a camera to IR? If you are serious you can watch these 3 videos of me converting a Panasonic DMC-LZ5 to IR. The videos are a total of about 20 minutes (how long it took me to do the conversion).
Part 1:
Part 2:
Part 3:
So, if you want to get into IR photography, first you need a filter, then ideally you need a converted camera, and finally, you need to get out and take pictures! It is a blast.
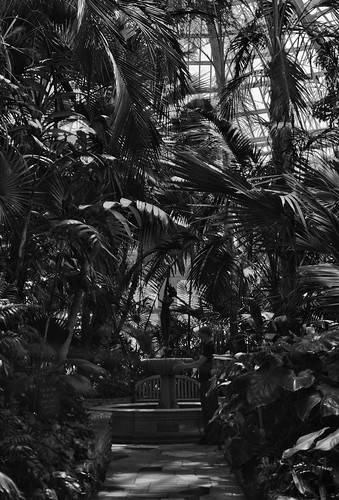
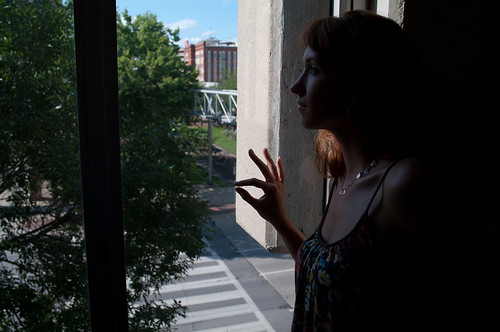
Had an idea for a shot that didn't quite turn out how you expected? Don't fret. Save the day in post processing. The above is how I pictured the shot in my head. A strong contrast B&W with a view outside the window. However, what I ended up with was the following.
I wanted her hand on the window, but when I converted to B&W it was in an awkward position that looked like she was giving a sign in mid air once I corrected the exposure. The initial shot was under exposed by about 2 f-stops from what I wanted. The light on her face wasn't strong enough relative to the outside light, and overall it would appear a dismal failure.
So how did I save the image? An inexpensive layer editing program for the Mac called Pixelmator. Once I learned how to properly use the program by reading Internet tutorials, I exported a partially corrected image from Lightroom that was near the exposure I wanted. I did this because Pixelmator can only develop RAWs with the default JPG setting.
Once in Pixelmator you duplicate the layer, adjust the exposure how you want, put the original layer on top, and then erase the original area where you want the adjusted areas to show through. Once you complete that step, you can merge the layers back into one. You repeat this several times until you end up with an image how you want.
After the exposure was set right I cloned out the awkward looking hand, and applied any other filters I wanted.
The question always remains, why didn't I just capture the photograph how I wanted in the first place? Well, first off, the camera doesn't allow strong enough curves for my B&W tastes, so post processing is required. And sometimes, you just don't see the shot until you get home and start processing. The important thing with B&W conversions is to capture the difference in light with the camera. Processing can be used to tweak it exactly how you want.