Sunday, August 2, 2009

Vines


I have been working at getting my Amazon reviewer rank up over the last couple years, for no good reason other than a personal challenge. When I started, I had a couple reviews and was ranked at something like 40,000. I thought that was terrible, I can do better than that. So I wrote more reviews and tried to keep them insightful and on topic. After a while my ranking started to climb. I set a goal to be at 10,000, then 5,000, and now I am at 1,800 or so with a current goal to be under 1,000.

What I noticed recently was some link about "Vine" program and how I should join this to contribute reviews, etc, and get free products. I had seen this for a while on my page, but just thought it was an advertisement and never clicked on it. Well, I finally did last week and found I was being invited to sign up for a program where I can get pre-release books and other products for review with the promise to return reviews (good or bad) for the product.

I am not saying this to brag by any means, but I am actually shocked something beyond satisfaction from completing a personal goal came out of upping my Amazon reviewer ranking. I am excited as this will give me the opportunity to read books that I usually wouldn't read, and I love to write reviews.

Here is my first: The Well Let me know what you think, and be sure to vote if you think it was helpful or not. It is one of my first book reviews, so feel free to comment what I could do better.

Monday, July 20, 2009

Bubble World


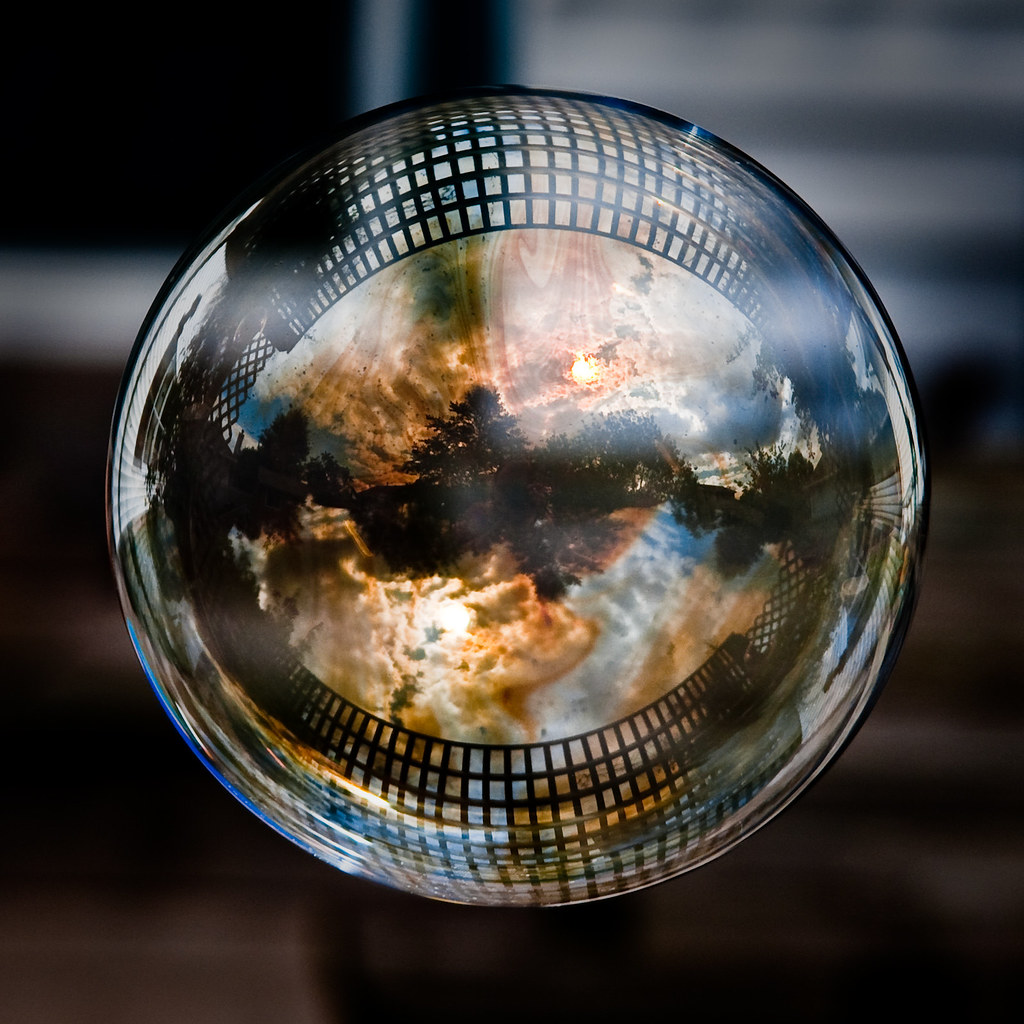
I was out enjoying the weather yesterday afternoon when my wife decided to blow some bubbles to entertain our son. I had the camera out, and thought it would be great to capture some photographs of the bubbles. I have tried before, but I have never been very successful. After nearly 100 attempts, this is my favorite.

What I learned in the process is you want to use AF-C (or your cameras continuous focus mode) with all focus points selected. The bubble itself doesn't have very strong contrast, so you will probably need some good reflections to help the camera lock focus on the bubble.

You need big bubbles. This bubble was about 8" in diameter. Search google for "Big Bubble Solution" and you should find some stuff that will work. Most big bubble solutions contain a mix of soap, glycerin, and water. The bubble solution in the colored jugs most of us used as kids does not hold up well for big bubbles.

Close is best. The reflection on the bubble takes on a more interesting perspective when you get up close and personal with it. A close focusing "macro" zoom is ideal. I used the Sigma 17-70mm f/2.8-f/4.5 and it worked out well with its ability to focus right up next to the lens surface, but anything with a minimum focus around 1 to 2 ft should be fine.

When shooting the bubbles, I set to continuous shutter release, and follow after the bubble trying to keep it in focus. Tricky backgrounds will sometimes trick the camera to focus on them instead. Just release the shutter button and try focusing again. Obviously wind is not conducive to catching a good bubble shot. Every time a gust hit my bubbles were gone.

The bubble primarily reflects what is behind the photographer, and thankfully, the photographer gets mostly cut off at the center. It seems to use a fisheye like projection, with a mirror image in both hemispheres, especially visible if the sky is much brighter than the ground. If the sky was darker the image might look a bit more like a circular fisheye, I would think.

So get out there, and try some of your own bubble shots. Try various bubble solutions, and different locations. I want to try one downtown by some tall buildings and surrounded by fire. Go have some fun capturing your own little fragile worlds.

All this talk of bubbles has me reflecting on my own life. We all live in our own little world. Our life follows certain patterns, and if those patterns are interrupted by even the slightest breeze, our life can change course. It is amazing how one seemingly small decision we made 10 years ago dominates our entire life in the present. What would have happened if you didn't make that phone call 10 years ago? How would your life be different?

We are driven by small currents that twist, turn, and combine to drive our life. Capturing photographs of bubbles is like capturing one of these small currents. We realize how fragile and delicate our lives can be. I love photography because I can capture these special moments.

Eric Tastad
See the rest of my flickr photos: http://www.flickr.com/photos/28177041@N03/

Wednesday, May 6, 2009

The Depth of Infinite Field

I found a new toy to play with. I have been taking some photographs of flowers lately, and I found I have been wanting a shallow depth of field to blur the background sufficiently, but that leaves too little of the foreground in focus. A friend suggested I try Helicon Focus, a product that stacks images focused at different points into a single image that combines the focused areas from the composing images.

The ability to stack images to make a single image with a deeper depth of field useful for macro or closeup work where the sharpest f/stop for many modern digital cameras is limited to around f/8-f/11 to prevent diffraction from softening the image. Many macro shots might require f/22 or higher to get the desired depth of field.

There is also something known as "hyperfocal distance". If the lens is focused at the hyperfocal distance, everything from half the hyperfocal distance to infinity should be acceptably in focus. In reality though, the closer to infinity or the near range the subject is the softer they will become. Print or view size and distances determine what the true hyperfocal distance is. The problem with hyperfocal distance is it can be a very long ways out for a telephoto lens. You might have to be 200 ft away from your subject.
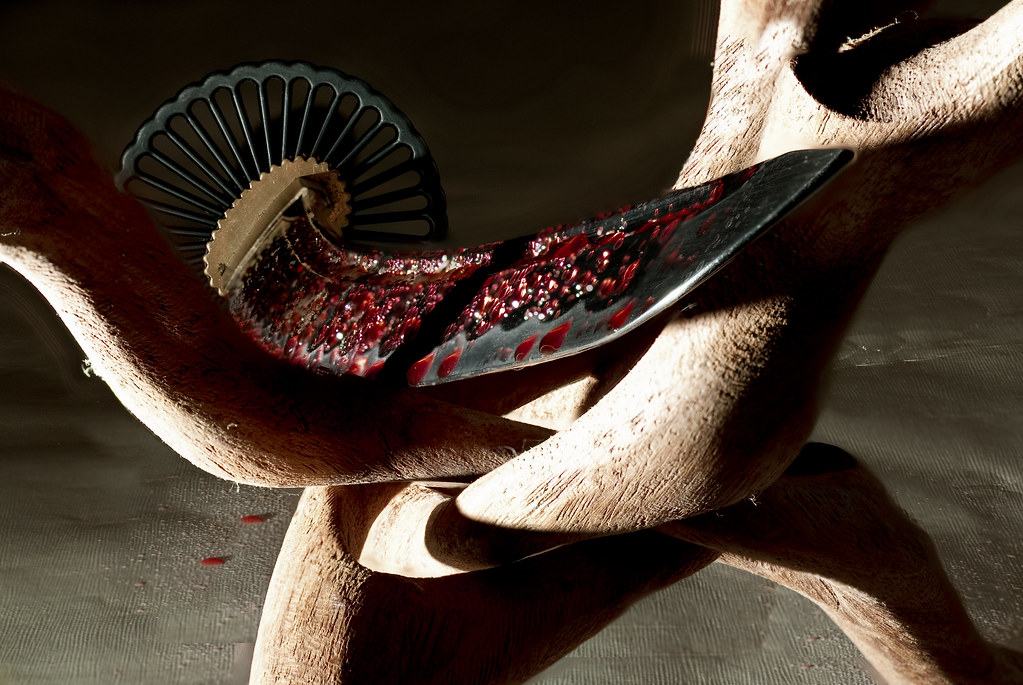
A solution is to use the Helicon (or equivalent) software to focus at multiple points between the subject and infinity (or the final focus point). These images are then stacked to produce depth of field unachievable by stopping down. A tilting lens/view camera can shift the focus plane out towards infinity, but at the expensive of defocusing somewhere else. This can put the entire picture in focus.

Since perspective is controlled by where you stand relative to the subject (and viewing distance from the print/image), this allows the photographer new ways of achieving differing perspectives. I can use a telephoto/macro lens to photograph a very long object away from the lens and keep the entire length in focus.

The big restriction is you have to take multiple images, so it won't work well on moving subjects. Thankfully they build in some manual retouch tools as well to fix small amounts of movement, etc, but forget it if you are trying to photograph flowers in the wind.

The program is amazingly intuitive to use, and it worked correctly the first time for my simple watch example. On more complicated images where there is a lot of blurring of the background it can be a bit trickier. As an object blurs in either the foreground or background the blur becomes larger the further it is from the focus point. These blurs, for the lack of a better word, can confuse the tool sometimes. Thankfully there is a manual retouch feature built in that works a lot like the selective brush in Lightroom 2 combined with a tool like Clone in Photoshop.

A second problem when focusing on objects progressively further away is the lens focal length changes, and sometimes this is quite substantial, especially with internal focus (IF) lenses. The focal length is measured at infinity. A lens like the Tamron 18-250mm, which is a fine lens BTW, might only be 150mm at close focus, and doesn't reach 250mm until infinity. This causes objects to scale differently and your field of view to change. Thankfully, the tool compensates for this quite nicely automatically rescaling the images to be the appropriate size.

My main lessons learned are to overlap areas of focus a bit, don't use on moving subjects, and watch foreground/background blur that can cause artifacts (see the Iaito, practice sword, above), and use the smallest aperture you can get away with as it limits the problematic foreground/background blur.

I am thrilled to find such a tool, thank you Ryan, as it brings more depth to my photography, horrible pun intended.

Eric